
Building a chat application with Sensay API in Next.js
This tutorial will guide you through building a modern chat application using Sensay API with Next.js and TypeScript. You'll learn how to integrate the API, handle authentication, manage users and replicas, and implement a fully functional chat interface.
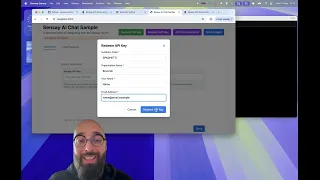
Demo
Find the source code at https://github.com/sensay-io/chat-client-sample
You can see a deployed version of the tutorial application at https://sensay-api-chat-tutorial-sensay.vercel.app/
Prerequisites
Before you begin, make sure you have:
- Node.js 18+ installed (we recommend using fnm for version management)
- A Sensay API key (either an invitation code or an active API key)
- Basic knowledge of React, TypeScript, and Next.js
- Git installed to clone the sample repository
If you don't have an API key yet, you can request one by filling out the form at Request API Key or redeem an invitation code if you have one.
Getting started
Clone the sample repository
Start by cloning the sample repository which contains all the necessary code to run a fully functional chat application:
git clone https://github.com/sensay-io/chat-client-sample.git
cd chat-client-sample
Install dependencies
Once you've cloned the repository, install the required dependencies:
npm install
Set up your environment
You can set up your environment in two ways:
Option 1: Using .env.local (Recommended for development)
Create a .env.local file in the root directory with your API key:
NEXT_PUBLIC_SENSAY_API_KEY=your_api_key_here
Option 2: In-app configuration
Alternatively, you can paste your API key directly in the application interface when prompted.
Run the application
Start the development server:
npm run dev
This will start the application on http://localhost:3000. Open this URL in your browser to access the chat application.
Understanding the application architecture
The sample application demonstrates a complete integration with Sensay API, handling:
- Organization authentication
- User creation and management
- Replica creation and retrieval
- Chat functionality
Key components
- SDK Generation: The application uses openapi-typescript-codegen to generate a fully typed client from the Sensay API OpenAPI specification.
- Authentication Flow: Demonstrates both organization-level and user-level authentication.
- Chat Interface: A responsive UI built with React and Tailwind CSS.
Application initialization flow
When you first start the application, it performs the following steps:
- Initializes a client using your provided API key
- Checks if a sample user exists, creating one if necessary
- Checks for existing replicas, creating a default one if none exists
- Sets up the authenticated chat session
This flow mirrors the steps you would typically take when integrating Sensay API into your own applications.
Key implementation patterns
Let's examine the core patterns used in the application that you can adapt for your own projects.
Client initialization
The application initializes the Sensay client in two different ways:
// Organization-level authentication (admin access)
const organizationClient = new Client({
  BASE: 'https://api.sensay.io',
  HEADERS: {
    'X-ORGANIZATION-SECRET': apiKey,
    'Content-Type': 'application/json',
  },
});

// User-level authentication
const userClient = new Client({
  BASE: 'https://api.sensay.io',
  HEADERS: {
    'X-ORGANIZATION-SECRET': apiKey,
    'X-USER-ID': userId,
    'Content-Type': 'application/json',
  },
});
User management
The application demonstrates how to create users and check if they exist:
// Check if user exists
try {
  const user = await organizationClient.users.getUsersGet({
    id: userId,
  });
  console.log('User exists:', user);
  return user;
} catch (error) {
  if (error.status === 404) {
    // Create user if not found
    const newUser = await organizationClient.users.createUsersPost({
      id: userId,
    });
    console.log('Created new user:', newUser);
    return newUser;
  }
  throw error;
}
Replica management
Similarly, the application shows how to list and create replicas:
// List replicas for the user
const replicas = await userClient.replicas.listReplicasGet();

if (replicas.items.length === 0) {
  // Create a new replica if none exists
  const newReplica = await userClient.replicas.createReplicaPost({
    name: `Sample Replica ${Date.now()}`,
    shortDescription: 'A helpful assistant for demonstration purposes',
    greeting: 'Hello! I am a sample replica. How can I help you today?',
    ownerID: userId,
    private: false,
    slug: `sample-replica-${Date.now()}`,
    llm: {
      provider: 'openai',
      model: 'gpt-4o',
    },
  });
  return newReplica.uuid;
}

// Use the first available replica
return replicas.items[0].uuid;
Chat interaction
The chat completion functionality demonstrates how to send messages and receive responses:
// Send a chat message and get a response
const response = await userClient.replicaChatCompletions.createChatCompletionPost({
  replicaUuid: replicaId,
  content: message,
});

if (response.success) {
  // Process and display the response
  setMessages((prev) => [
    ...prev,
    { role: 'assistant', content: response.content },
  ]);
}
Regenerating the SDK
One of the key features of this integration approach is the ability to quickly adapt to API changes by regenerating the SDK. The Sensay API evolves frequently, and regenerating your SDK ensures you always have access to the latest features.
To regenerate the SDK:
npm run generate-sdk
This script fetches the latest OpenAPI specification and generates updated TypeScript client code in the src/sdk directory.
We recommend regenerating your SDK regularly to stay current with the API. The script uses openapi-typescript-codegen, which provides type-safe access to all endpoints.
Troubleshooting common issues
Authentication errors
If you encounter authentication errors:
- Verify your API key is correct and not expired
- Check that you're including the proper headers for your requests
- Ensure you're using the correct user ID when authenticating as a user
"User not found" errors
This typically means the user ID you're using doesn't exist in your organization:
- Verify the user has been created
- Check that you're using the correct organization API key
- Ensure you're not mixing user IDs between different organizations
SDK type errors
If you encounter TypeScript errors after regenerating the SDK:
- Make sure your code is updated to match any breaking changes in the API
- Check the Versioning documentation for information about API changes
- Join the Sensay API Telegram Channel for announcements about breaking changes
Next steps
Now that you have a working chat application, consider:
- Customizing the UI: Adapt the interface to match your brand and requirements
- Adding Training: Use the Training API to make your replicas more knowledgeable
- Implementing Additional Features: Explore features like voice integration or multiple replica support
- Deploying Your Application: Deploy to services like Vercel, Netlify, or your own infrastructure